Showing posts with label snack. Show all posts

20 January 2015

Kale crisps

I know I'm a bit late with my kale chips - they have been around for quite some time. But they do say, better late than never! To be totally honest with you I'm not a huge fan of kale. So far I've tried to include it in juices and have tried to steam it a couple of times, but so far no luck - I'm still not convinced that I actually like it. I have never had kale crisps before so I had no idea what to expect and, frankly, I was half expecting that they would turn out not so good. But oh boy was I proven wrong - they came out absolutely divine!

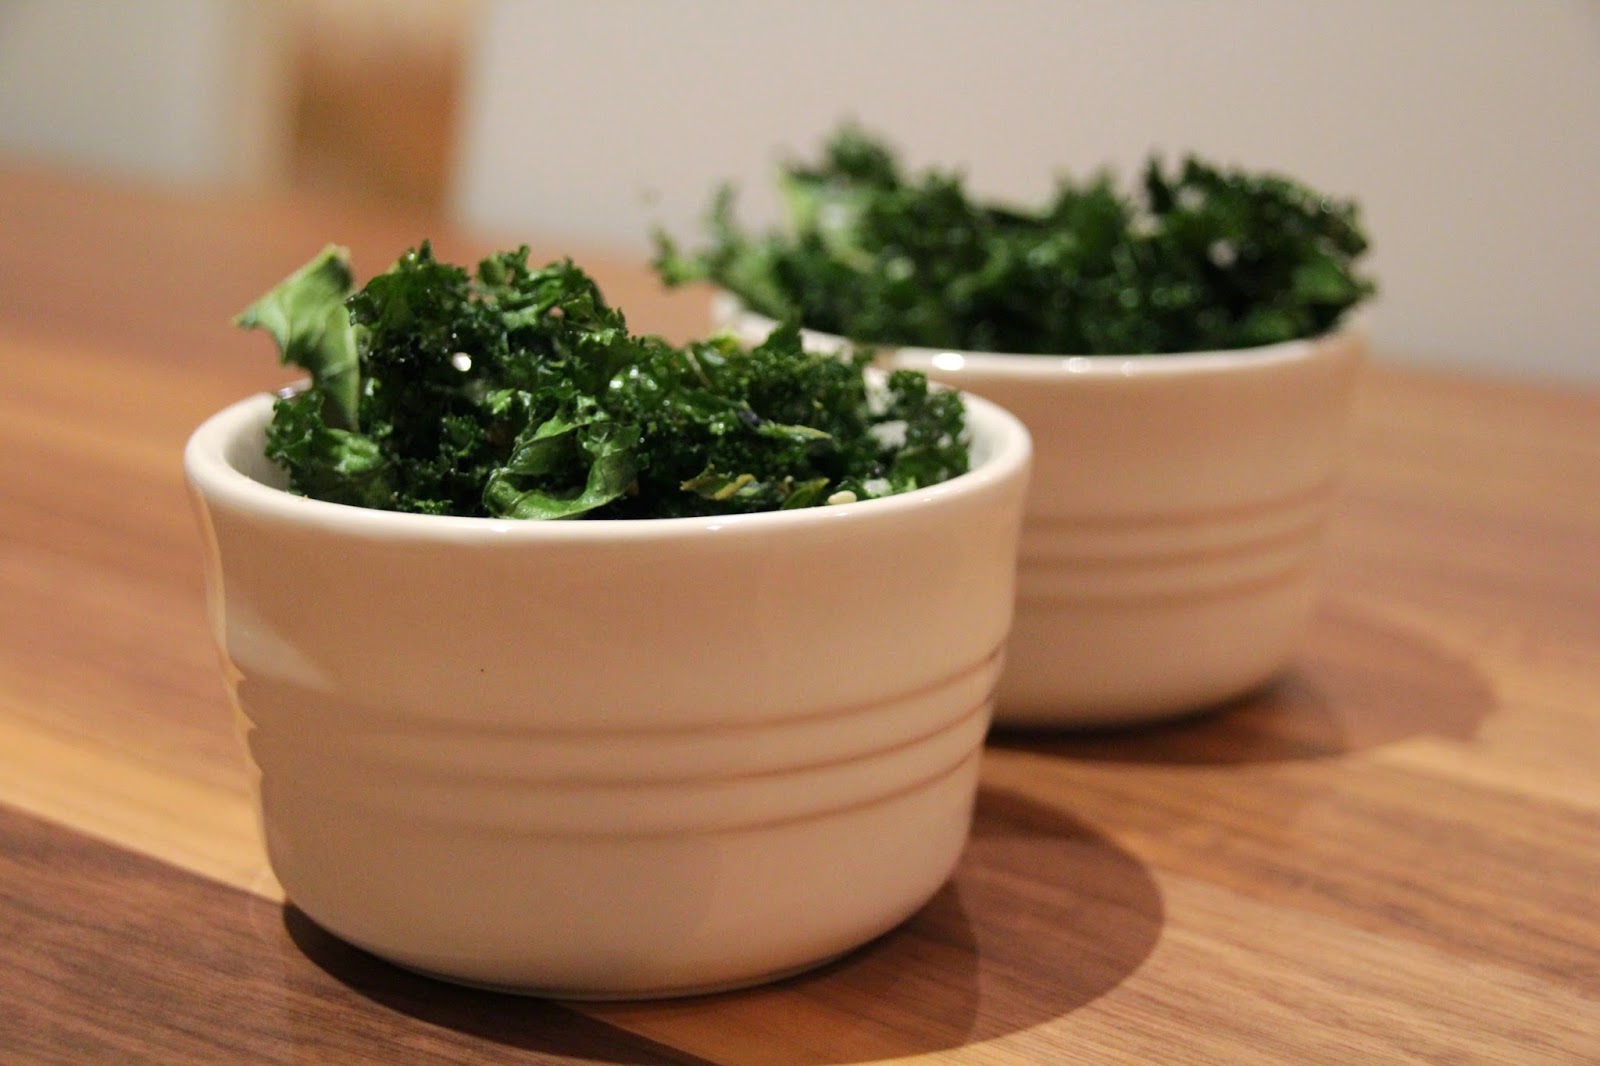
I decided to try out two different flavours. I made one batch with sea salt and the other one with a wasabi sesame spice mix I have and they both came out really nice. I love the spicy kick the wasabi ones have, but out of those two I prefer the classic sea salted one. I really don't know whether that's because the crisps are bigger (I made that batch first) or is it really just because I love the taste. But either way both are really-really nice. It's lovely to have something to nibble on that is not too high in calories and too unhealthy. Only word of advice though - as they have quite a bit of salt don't overindulge.

The only downside I can think of is that as they're so thin and crispy you end up with kale crumbs everywhere. But then again, the same happens when you eat normal crisps so I really should't be complaining.

I will definitely make them again - I have already decided to try one out with chilli flakes, then one batch with Ras el-Hanout, cajun ones could be quite nice and I would love to know how they would taste plain, no salt or anything ... So by the looks of it, I'll be making kale crisps in every couple of days as I really want to try them all!

Ingredients
- 90 kale (after the stalks have been removed
- 1 tbsp olive oil
- Sea salt
- other spices/herbs/seasoning

Directions
Wash and dry the kale completely (I left it out for half a day to dry out properly). Preheat the oven to 130C fan. Place it in a big bowl and add the olive oil. Mix the olive oil in (I used my hands) to make sure that the kale is evenly coated. Cover the baking tray with baking paper and place half the kale on it, spreading it out and making sure that it is not piled up. Then season it with either salt or other spices and place it in the oven and cook for 20-23 minutes until nice and crispy. After it's cooked, take it out and leave to rest for 5 minutes, this ensures that they really crisp up. Place in a bowl and enjoy!


29 July 2013

Steak sandwich

This is in my opinion the most manly meal I've ever wrote a post about - a proper steak sandwich. And I'm sure I'm not wrong in saying that it is probably every meat eating man's dream. I find that there's something really manly about eating steak - maybe it's the whole caveman thing in a more modern angle.

We have a couple of steaks at home that need to be eaten before we leave for Vietnam this weekend and I started it by making a lovely steak wrap for my other half for yesterday brunch. And then suddenly inspiration hit me - I should make him a steak sandwich instead. And I wanted to make him a proper steak sandwich and thus I found myself making bread a couple of hours later as I really wanted all of it to have a lovely home made feel to it. And I must say I was not disappointed with the outcome.

Apart from baking the bread and letting the steak come up to room temperature the whole thing was really easy to put together. And by all means use some nice and fresh bread or bread rolls from a bakery - had I been short of time that would have been exactly what I would have done.

I really love the rustic look and feel of those sandwiches. And you should have seen my significant other's eyes when he saw them when I was taking photos. That was pure happiness. So here you go - a juicy filling homemade lunch which is guaranteed to go down a treat.

Ingredients
(Makes 2 sandwiches)
- 4 slices of bread (I used this)
- 200g steak
- Butter
- Lettuce
- 1/2 tomato, sliced
- 4 tsp mustard
- 2 gherkins
- Salt, pepper to season
- Olive oil

Directions
Start by taking the steak out of the fridge 1 hour before cooking in order to allow the steak to come to room temperature before cooking it. When the time has passed, heat up a non-stick pan. In the meantime season both sides generously with salt and pepper and then rub the steak with some olive oil. When the pan is hot, place the stake on it and cook for a couple of minutes (this really depends on the thickness of the steak and how well do you like it cooked). Whilst the steak is cooking, spread some butter on all four slices of bread and add lettuce and tomatoes on 2 slices. Then flip the steak and cook for the same amount of time. In the meantime slice up the gherkins. When the steak is done, remove it from the pan, place on a chopping board, cover with cling film and let it rest for about 5 minutes, so the juices that concentrated in the middle of the steak could even out and result in a more flavourful and juicier steak.

So finally, slice up the steak, divide it between the sandwiches, top it off with some mustard and gherkins. Place the other slices of breads on top of it and enjoy!

18 June 2013

Chocolate chip muffins

Before even going to my today's post I need to apologise for leaving such a huge gap between my posts. After finishing off my master's I basically went travelling for 2,5 weeks - flying back to Estonia to visit my parents and popping over to London to check on my flat and now I'm back in Singapore and have almost managed to get rid of my jet lag. I have to admit that it is a lot more difficult to make myself get up in the morning if there's no need for it - I could easily just stay in bed the whole day. I honestly thought that I'd have time to cook something new and share it with you, but it would have been really difficult to make my hungry family wait until I take my pictures so getting new material for the blog whilst I was in Estonia was nearly impossible. It's a different story with London as I was there alone for half of the time and my sister joined me for the other half of the week, so no issue of keeping the family waiting, but we were so busy with all the shopping and appointments that I just didn't have the time and the energy to whip up something worthy of sharing. So that's my explanation for not updating my blog. I'll try to be better over the rest of the summer, but I already know for a fact that there are at least 2 weeks when I'm travelling - so no posts coming then.

Now to the recipe then. In my honest opinion, every girl (or a guy for that matter) should have a simple basic muffin recipe which can be put together without having to go shopping for all the special components that some recipes require. This is a very simple and straightforward recipe and basically all one needs to do is to mix together the ingredients in a big bowl and then bake the muffins.

In order for muffins to be good, the recipe does not necessarily need to be complicated. I made these for  my little sister when she had a friend sleeping over. She actually wanted to make muffins herself from a  muffin mix, but I just could not let her do that - homemade ones are so much better! And all that was left over was "taken care of" by my other sister and my mum - even my dad had few, and that's something.

All in all, this is an amazing quick-fix for an upcoming party if you're short of time, but still want to make something tasty yourself, rather than resorting to ready made mixes or ready made muffins ... I promise that by serving these muffins - moist and fluffy on the inside and crispy on the outside -  positive comments are guaranteed. Or a lovely movie night in, picnic, having friends over for coffee or even better - if you feel like having something indulgent for breakfast. Enjoy!

Ingredients

(Makes 18)
- 2 medium eggs
- 200g caster sugar
- 250ml milk
- 125ml sunflower oil (or other vegetable oil)
- 400g plain flower
- 3 tsp baking powder
- 1 tsp salt
- 175g chocolate chips (can have more or less than that)

Directions
Preheat the oven to 180C. Line a 12-hole muffin tray with paper cups / grease the tray or use silicone muffin cups. Then beat the eggs in a bowl and mix in the oil and milk. Add the sugar and mix until its dissolved. Then add the dry ingredients - sift in the flour, baking powder and salt and mix until smooth. Finally add the chocolate chips and give it a nice stir so they're scattered evenly throughout the batter.

Fill the muffin cases 2/3 full and bake for around 25 minutes. Enjoy right out of the oven or let them cool. For even more indulgence serve with a scoop of vanilla ice-cream.

Basic muffin recipe from BBC Good Food


16 May 2013

Wholemeal bread with mixed seeds

As I've had quite a bit of free time in my hands lately I decided to give bread-making another go. As I absolutely love my rye bread patties I wanted to give making a wholegrain loaf a go. We all know the benefits of eating wholegrain - more fibre, meaning that we'll feel fuller for longer and also fibre aids digestion. However, I've not quite found the perfect wholegrain bread here in Singapore and so as I'm on my summer holiday I just decided to give it a go. And the speed at which the first loaf disappeared I just had to make a second one few days after. I can honestly tell you that it is nearly impossible to resist fresh and warm homemade bread so it is not surprising that we finished over half of the loaf within 30 minutes of me taking it out of the oven. We had the bread with slightly salted butter and some turkey ham and I can tell you that it felt like a big pile of goodness had just melted in my mouth the moment I took the bite.

Compared to the store-bought breads this is a lot denser and has a slight nutty taste to it, which in my opinion makes it taste even better. And as to the denseness, that just means that you need to eat it less than the store-bought stuff to feel satisfied (but as said before, it didn't stop us from eating over half the loaf in one go).

Obviously this isn't proper proper bread in the sense that I still used yeast and not a started, but frankly I'm a bit impatient and when I decide to make something I want to make it now and not wait for like a week before I can finally get down to baking my bread. So call it cheating if you want to, but I promise that the moment you try the bread you couldn't care less whether it was made with starter or yeast.

I'd love to tell you for how long it keeps, but as you might have guessed already it disappears pretty fast. So far it's kept nice and soft for 2 days in a airtight container - I sliced up the bread and keep them in small batches in ziplock sandwich bags. This is obviously best enjoyed when fresh, but it is also divine toasted. Eat as a snack, make it into a filling sandwich, serve on the side of a soup or warm it up and serve with some butter - any way is delicious.

Ingredients

(Makes 1 loaf)
- 500g strong wholemeal bread flour
- 1/2 tsp salt
- 1 tsp honey
- 1 tsp dry yeast
- 1 tbsp olive oil
- 380ml warm water
- Mixed seeds, to sprinkle

Directions
First mix the flour, salt and dry yeast. Then add warm water and honey. Mix the dough and when its still a bit lumpy add the olive oil. Knead it well until it feels nice and smooth. Place in a bowl and cover with a tea towel and let it stand for 1,5 hours in a warm place for it to double in size.

Place the dough on a floured surface and knead once more (for around 3-5 minutes). If you wish to have seeds in your loaf then this is the place to add them. Line the bread making tray with baking parchment or just cover with a small layer of olive oil and place the dough in the tray. Sprinkle over with some mixed seeds (I used sunflower and pumpkin seeds this time) and cover the tray with a tea towel. Preheat the oven to 200C (fan) and let the bread rise for another 25 minutes. I find that this is approximately the same amount of time needed for the oven to heat up. Bake the bread for 35-40 minutes.

When ready remove from the tray and place on a cutting board and cover with a towel and let it cool down a bit before cutting (just makes it easier and this way you'll avoid burning yourself as well). Enjoy!


26 April 2013

Blueberry & Greek yogurt parfait

As promised a while ago I've finally gotten around to post another variation of a parfait and this time with just blueberries. Unfortunately there is no bigger story behind this recipe as it was just an alternative take on the parfait I made few weeks ago.

But regardless of that it makes a perfect snack, breakfast or even dessert and I can't think of anything better to serve at a nice summer BBQ. And not only is it delicious, I am still fascinated about how good the parfaits look like - really make me feel like I am indulging in something rather luxurious and it certainly does not feel like eating yogurt with berries. Different versions of parfaits are definitely going to be part of my summer and I promise not to bother you with just another variation of it but next time I make a parfait post I'll make sure it's something fancier and bigger. But the fact that this is not big nor incredibly fancy, it is still very delicious (and good for you at the same time).

Ingredients

(Makes 1)
- 80g blueberries
- 50g Greek yogurt
- 20g granola


Directions
Layer the ingredients in a nice glass or a bowl and serve immediately.


19 April 2013

Rye bread patties

Well, I'm officially done with all the studying and now just have to wait for my results and graduation. I always find the first few days of holiday quite difficult to cope with - after being so busy during the exams and deadlines and then suddenly I find myself in a situation where I don't know what to do with my time. So yesterday after I came come I decided to do something that I've always wanted to try but have never gotten around to doing - try to make rye bread patties, just like the ones I always bring with me from Estonia.

Both my fiancé and I are huge fans of this healthy food and the thing is that I haven't been able to find it here in Singapore. There is Fazer Rustika, which is quite close in taste but its pretty pricey (I get 1,5 packs of that for the money I spent on the ingredients to make the batch at home) and it really adds up, as we eat a lot of it. So that gave me another (and a very good reason) to give it a go.

After some googling I finally found a recipe that I was willing to give a shot. I needed something that was relatively quick to make (this one took around 2 hours, including the baking time) and that is fast for bread making as most recipes require you to make the started days beforehand. I have to admit that I didn't know what to expect and when I finally tried it I was blown away - I never want to go back to the store bought stuff! Warm, soft on the inside, nice crust on the outside and divine smell (the whole flat smelled of home-cooked bread) - what is there not to love! I love it because it is so easy to make, doesn't require a breadmaker or kneading (you can use a spoon) and just takes 15 minutes to cook. Trust me, once you try you'll understand what I'm talking about.

This bread is perfect for breakfast sandwiches,  to accompany soups and stews and something nice to just toast and eat with butter when feeling peckish.

Ingredients

(Makes 12 breads)
- 10g instant yeast (or 30g fresh yeast)
- 500ml warm water
- 700ml rye bread
- 200ml white flour
- 2 tsp salt
- 1.5 tbsp honey
- Extra rye bread for making the shapes

Directions
Firstly mix the yeast with 1 tablespoon warm water to make smooth paste and add the rest of the water and 400ml of rye flour. Mix until nicely combined, cover with cling film and set aside to a warm place let the dough raise for 1,5 hours.

After 1,5h add the rest of rye flour, white flour, salt and honey and mix well. You can use a spoon to mix it as the dough is quite liquid. Line two baking trays with baking paper and take a big spoon of dough, mix it into a ball and press flat (make sure you're hands are dusted with rye flour as otherwise the dough will stick) and place on the baking tray. Cover both trays with a hand towel and let the bread rise until the oven heats up to 225C. Bake both batches for 12-15 minutes until the breads are nice and light brown on top.

After taking them out and before cutting them half let them cool down under towel again (they're easier to halve this way).

Recipe from toidutare.ee


15 April 2013

Strawberry & Greek yogurt parfait

I've been having scrambled eggs on rye bread toast for breakfast for a while and really craved something different. So yesterday when we did out grocery shopping I picked up some nice ingredients - strawberries, blueberries, bananas, Greek yogurt, honey granola - which would enable to make myself whatever I wanted for breakfast. And after giving it some though I decided to make a parfait (fancy way of describing a layered dish). I've seen so many posts of those delicious looking pots that I just had to give it a go at home.

I really love the way parfaits look like. You can combine different flavours (and colours!) to make something that is beautiful to look at, tastes divine and doesn't have a bad effect on your efforts to stay fit and healthy. I decided to just use strawberries on this one, but I'll probably try a mix of blueberries and strawberries in a next couple of days (I'll make sure I'll post it as well).

I made the parfait with Greek yogurt as opposed to normal natural yogurt as I find that it is a lot milder, less sour in taste and as that wouldn't be enough it also has a really nice rich creamy texture. Also, after some googling I found out that it's higher in protein, lower in carbs and sodium than natural yogurt and thus making a perfect ingredient to incorporate into your breakfasts. Coupled with delicious and sweet strawberries, which are rich Vitamin C, and some granola (I used Kellogg's Special K Honey and Nut as I haven't gotten around to making my own) to add some fibre and a nice crunch to the meal.

Have this for a healthy breakfast, lunch or even serve it as a dessert - fills you up, tastes delicious and the colourfulness is guaranteed to light up your mood.

Ingredients

(Serves 1)
- 100g strawberries, chopped
- 100g Greek yogurt (I used 0% fat Total)
- 20g granola

Directions
Layer the strawberries and yogurt in a glass or a bowl (I did 50g strawberries - 50g yogurt - 50g strawberries - 50 yogurt) and then top it all off with some nice granola and enjoy!


10 March 2013

Raspberry yogurt muffins

I realised today that I haven't had muffins for breakfast in ages and as we were slept without an alarm this Sunday, a plan to have muffins for brunch sounded perfect. Warm, just out of the oven homemade muffins make an amazing breakfast (or brunch) and they are so quick and easy to make. In addition, muffins come in all tastes and sizes so there's bound to be something that fits your taste.

I've made these muffins quite a few times before, but that was during my pre-blog era. They are incredibly light and moist and have this melt in your mouth feeling. Even my friends who don't have a sweet tooth love them as they are so well balanced between sweet and sour. I love the addition of yogurt in these muffins as it creates the lightness and not the soaked in oil feeling you get with store bought ones.

So, if you're in search for that perfect breakfast muffin that is quick and easy to make and also doesn't end up in you consuming your daily calorie intake during breakfast then this is the way to go. They also keep well for few days (the maximum mine have stayed have been 2 days as usually they are all gone during the day I made them). Have them for breakfast, serve them as a dessert or make them for a picnic - one really nice and universal muffin recipe.


Ingredients
(Makes 12 - approx 160 cal per muffin)
- 50g butter, melted
- 2 dl sugar
- 2 eggs
- 1.5 dl natural yogurt (fat free)
- 3 dl flour
- 1.5 tsp baking powder
- 2 dl raspberries

Directions
Firstly melt the butter and set it aside to cool. Line a 12-hole muffin pan with muffin cups and preheat the oven to 200C. Then whisk the eggs and sugar. Add natural yogurt, melted butter, flour and baking powder and mix well. Divide the batter up between the holes and press 3-4 raspberries into each muffin cup. Bake for 15-17 minutes.

Recipe from a book called "Muffinid 2"


3 March 2013

Salmon canapés

I went to visit my parents in Estonia last week and as it is my birthday today, I also had a small sit down with my friends and a late lunch with my grandmothers. Part of me is already fed up with cakes - I made three cakes in three days and they were all gone by the time I left for my flight. But instead of a cake recipe I'll share a quick and easy nibbles recipe.

Made those salmon canapé snacks to have before indulging in the various different cakes and they really went down as a treat - everyone loved them. Serving salmon on a rye crisp bread instead of the more traditional blinis ups the health rating of the recipe in addition to adding a nice twist to it. These small squares are incredibly quick and easy to make - just make sure that you don't make them ages in advance as the cream cheese will soften the rye crisp bread and the snack is not so crispy anymore.

Feel free to experiment with seasoned cheese spreads and server with a squeeze of lemon. Also, for a more sophisticated take decorate some squares with baby capers. All in all - a quick, tasty and easy party canapé, which in addition to its deliciousness also counts towards your Omega 3 intake.

Ingredients
(Makes 24)
- 175g smoked salmon
- 8 Finncrips rye crisp breads, cut into 3
- 150g cheese spread (or cream cheese)
- Dill, to decorate

Directions
Cut the rye crisp breads into three equal size pieces and top each off with a generous amount of cheese spread. Then cut up the salmon and place on top of the cheese. Place the canapés on a plate and sprinkle with dill.


15 February 2013

Valentine's Day strawberries

When it comes to romantic food it is difficult to go wrong with strawberries, chocolate and whipped cream (and not forgetting a nice bottle of champagne) and as this is our very first Valentine's Day as an engaged couple (he popped the question 5 days ago while we were on a long weekend break in Bangkok) I thought of treating my fiancé - love the way it sounds - to a romantic and relaxed evening at home.

For the main course I made simple homemade pizza and for dessert I went with the timeless classic. To be honest, I'd been looking at dessert recipes for months now to see if I could find anything special, but the choice hasn't been anything as good as one would have thought. Although we both love cakes (especially cheesecakes) it's quite pointless to make a cake that is meant for 12 as it will simply go off before we'll manage to eat it all. And on the other hand I needed something that I could make in advance as I'm coming home from a quite late lecture and I won't have time to prepare a dessert that will make few hours to make. So faced with all these problems I decided to go with the simple yet classic (and a bit of a cliche) option to serve strawberries. The more I thought of the idea the better it sounded - it can be made ahead, it looks delicious, tastes really nice and it's meant to be eaten with your fingers, meaning that the whole process can be very romantic as well.

So, long story short, this is a perfect treat for the loved one for any occasion you want them to feel special. Experiment with different chocolates and different flavours - sprinkle some nuts or cookie crumbs and drizzle with some (salted) caramel. I do realise that it is not a recipe per se, but it just looked so pretty that I could not resist sharing it with you.

Ingredients
- 450 fresh strawberries, washed, dried and leaves removed
- 200g white chocolate
- 70g dark chocolate
- Silver balls or other sprinkles for decorating
- Whipped cream, optional

Directions
Place the white chocolate in a bowl and put it over a pot of hot (nearly boiling) water and let it melt. Do the same with dark chocolate. In the meantime, wash and dry the strawberries.

To decorate dip most the strawberries into white chocolate and place on a plate covered with baking parchment (to prevent them from sticking). Sprinkle some of them with silver balls and drizzle other ones with dark chocolate and leave some plain white. Place another sheet of baking parchment on a separate plate and put the remaining strawberries there. Drizzle them all with dark chocolate and decorate some with silver balls.

Leave to set for a bit and then place them in a nice bowl and serve. If you wish, serve with fresh whipped cream on the side. Enjoy!


11 January 2013

Wraps

Instead of making a single post about every wrap I decided to group the wraps all together like I did with smoothies and up-date the post whenever I try out a new flavour.

To put it simply I really-really love wraps. They make a perfect food for picnic, garden party or just something to put in your lunchbox. In addition to being so universal you can basically wrap up anything you have in the fridge at the moment, so the possibilities are endless. They are filling, can be made healthy and in addition to all that they are great for having kids eating vegetables - I remember that I never unwrapped my wrap in order to eliminate the tomatoes, lettuce and cucumber that was in there. Incredibly easy to make, do not make a mess out of the kitchen and can be eaten every time of the day, hot or cold, with a sauce or a side dish or without. So, to put it shortly, wraps are probably the easiest universal foods out there and here are just a few examples of the many possibilities. Feel free to skip or substitute an ingredient and play around with different combinations.


Salmon wraps
(Makes 2)
- 2 wholegrain tortillas
- 100g smoked salmon
- 80g cream cheese
- 2 large iceberg lettuce leaves
- 2 tsp baby capers
- Pepper, to serve

Place the tortillas on a plate and spread one side with the cheese spread. Wash and dry the lettuce leaves and place on top of cream cheese. Then divide the salmon evenly between two tortillas, place a spoonful of capers on top and sprinkle with some fresh pepper (or squeeze lemon juice). Then roll the wraps up and either eat immediately or wrap in a cling film and keep refrigerated until serving.


Turkey and cranberry warps
(Makes 4)
- 4 wholegrain tortillas
- 200g smoked turkey breast
- 4 tbsp cranberry sauce
- 60g baby spinach
- 60g bean sprouts

Place the tortillas on a plate and cover each with 1 tbsp of cranberry jam. Then slice the turkey breast into thin strips and divide it up between the tortillas. Top each tortilla off with baby spinach leaves and bean sprouts. Roll them up and enjoy either straight away or wrap in some cling film and keep refrigerated until serving.

10 December 2012

Christmas flavoured cookies

With Christmas coming closer every day I though of sharing something a bit different with you. I know how difficult it is to come up with Christmas presents and frankly, store bought cookies and sweets just won't do the trick. And as home-made presents are in this holiday season I decided to make a huge batch of Christmas flavoured cookies and give them as presents. Trying to make the cookies taste of Christmas, I made white chocolate and cranberry cookies, dark chocolate and orange cookies and dark chocolate and mint cookies. So far all the feedback I've received has been positive. I have to admit that I did munch on quite a few cookies before wrapping them up and they honestly were delicious and most of all they made me feel very Christmassy. Of course, they are also perfect to be enjoyed with a nice cup of tea or coffee and they make a great snack. 


Obviously, feel free to play around with different tastes - try different flavoured chocolates or add nuts to the cookies. Also, the quantities here are not fixed, I just noted down what I added to my Christmas flavoured cookies. And when it comes to presents and baking in general don't forget the magic ingredient - make them with love, because it does make a difference. I wrapped them up in a see-through wrapping paper but there are amazing biscuit tins and jars and gift bags out there, which means that each and every present can be unique.


Ingredients
(Makes approximately 40 cookies)
950ml flour
- 1 tsp baking powder
- 1 tsp salt- 150g unsalted butter, melted and cooled down
- 480ml packed light brown sugar
- 240ml white sugar
- 2 egg
- 1 egg yolk
- 2 tbsp vanilla extract

- 1/2 orange zest, grated
- 100g white chocolate, chopped (or   use chips)
- 100g good quality dark chocolate, chopped (or use chips)
- 30g cranberries 
- 100g After Eight, chopped 

Directions
Preheat the oven to 160C. Line a baking tray with baking parchment.

In a medium bowl, whisk together flour, baking soda and salt. In a bigger bowl mix the melted butter, brown and white sugar. Then beat in the egg and egg yolk and lastly add the vanilla. Gradually add the flour mixture to the sugar mixture until evenly moistened. Divide the dough into three and place in different bowls. Add white chocolate chips and cranberries to one bowl, dark chocolate and orange zest to another bowl and after eight pieces into the third bowl. Mix well until well combined


Roll the dough into balls and press down the cookies on the baking tray with your palm to make them flat.

Then bake them for 5-7 minutes for smaller cookies or 12-15 minutes for larger ones or until the edge looks golden brown and the middles don't look quite set. Bake them for a bit longer if you prefer your cookies crunchier (I like mine a bit soft inside so I take them out a bit sooner).