18 March 2017

Smoked salmon bagel

I am a huge fan of breakfasts and I can't think of any other meal I enjoy more than leisurely breakfasts during the weekend. There is something so nice about eating something and drinking coffee without having to worry about making it somewhere on time. And when during the weekdays I usually have just a quick cup of coffee before rushing out of the door to go to work then during the weekends I usually help myself to a second cup of coffee just because I have time for it. And all while catching up with the some of the tv series or flicking through the Financial Times. 

I can't say that I have my go-to weekend breakfast food as most of the time it really depends on what I have lying around the house. Sometimes I have scrambled eggs or granola or if I've thought a bit ahead and bought the correct ingredients I have a fresh juice or a smoothie. However, every now and then I crave for something quite indulgent and I have to say that for me that just means smoked salmon. And smoked salmon in any shape or form works - on toast with some avocado or as a side to my scrambled eggs. But what I really love is smoked salmon on a bagel with some cream cheese. It's very easy and quick to make, but super tasty and keeps me going for the whole day. 

So, if you're after an indulgent, but quick to make, breakfast look no further. I've also made mini versions of this for a brunch and the two trays I made went down a treat and disappeared in a blink of an eye. And in addition to being tasty they also look very presentable so make a nice addition to any brunch table. 

Ingredients
(Serves 1)
- 1 wholegrain bagel
- Philadelphia cream cheese
- 60g smoked salmon
- Fresh pepper / lemon wedge / dill / capers to serve

Directions
Cut your bagel in half. If your toaster has a bagel toasting setting feel free to warm up your bagel halves in there. Spread a generous amount of cream cheese on both sides of the bagel and top both sides off with slices of smoked salmon. Serve it with a squeeze of lemon and some fresh pepper. Or, alternatively, with fresh dill or capers - the choice is yours. 


17 September 2016

Courgette & cheese pie

So... It's been nearly 6 months from my last post and I really don't have any excuses for that. When I was still studying I used to think that the reason working people end up eating take-aways, deliveries and ready made meals was because they were lazy and were not trying hard enough, but now, having worked for the past year my outlook has totally changed. Although I still managed to cook at home most days, to eat relatively healthy took a lot of planning and dedication. And batch cooking was my biggest friend - I prepared few dishes over the weekend and all my lunches and dinners for the week were sorted. Admittedly it all wasn't very exciting, because I ended up making the same soups and stews over and over again, but still it was better than throwing a ready made meal into an oven. 

In addition to working, and summer being a relatively busy period, I moved to Dubai end of last month. So, another way of life to get used to and I have to admit that my meals during my first week here consisted mostly of oven grilled cheese sandwiches and ice-cream (very grown up, or what?). Now, after having settled in a bit, figuring out where to get the good groceries (good old Waitrose to the rescue) and getting my act together I've finally started to pay a bit more attention to my food. 

I don't know whether I've mentioned it on this blog before, but although I love eating out, I am a big fan of brining my own lunch to work. Not only does it work out cheaper than buying something out every day, it also means that I have a lot better idea of what I'm actually putting into my body. If I was in London around this time of the year (let's just pretend it's a normal autumn and the city is not suffering from a heatwave), I'd probably start preparing some lovely stews and soups. Easy to prepare in batch, transport, warm up and relatively healthy to top it off. However, over here I've struggled a bit because it's still over +35C outside and I just can't imagine warming up something warm and filling for lunch. As I went a bit overboard when ordering some groceries online and have half a fridge full of courgettes I was looking for something easy to make out of those that I could take with me to work. 

I came across this lovely recipe and just knew I had to give it a shot. I love courgettes and absolutely adore cheese. Add a bit of puff pastry and I knew I had found a winner. This one is super easy to make, makes a lovely packed lunch or even a great something to put together when having friends over. The topping is to die for and completed with a crispy puff pastry base. What else could you wish for? 

Ingredients

Makes approx. 12 slices
- 500g courgette
- Olive oil
- Salt
- Pepper
- 1 clove of garlic, crushed
- 150g Philadelphia cream cheese
- 100g grated cheese (I used 60g parmesan and 40g mature cheddar)
- 500g puff pastry

Directions

Preheat the oven to 200C. 

To prepare the filling, cut the courgettes into thin slices either using a kitchen mandolin, spiralizer, vegetable peeler, cheese knife or a normal knife. Place the courgette slices into a bowl, pour over some olive oil and   add the crushed garlic clove and a generous sprinkle of salt and pepper. Mix well and set aside for 10 minutes or so. 

Roll out the puff pastry so it would cover the whole baking tray and then place it on the baking tray which has been lined with baking parchment. Cut a line with a knife 1-1,5 cm from the edge of the pastry. Now, to prepare the cheese filling, mix together the cream cheese and 50g of the grated cheese. Spread it evenly on the puff pastry, keeping inside the line you've made with the knife. Then, place the courgette slices on top and bake for 15 minutes. Take out the tray, sprinkle with rest of the 50g cheese and bake for another 15 minutes. Enjoy hot or cold! 

Recipe from nami-nami.ee http://www.nami-nami.ee/retsept/11408/parmesani_suvikorvitsapirukas


20 March 2016

Champagne cupcakes

There is no better way to end a week than with a tray of lovely cupcakes. And not just any ordinary cupcakes - Champagne cupcakes. After a long-long time I hosted a brunch for my friends and as we had a bit of a bubbly theme (think Bellinis, Kir Royals and Buck's Fizzs) I thought it would be appropriate to have Champagne in whatever I was making for the dessert.

It was my sister's birthday a few days ago and as I know that she absolutely adores Lola's Cupcakes' Blueberry cupcakes and so I got her their latest cupcake recipe book. And on Friday night we were flicking through it and just by sheer accident we stumbled across this recipe and I just could not resist the temptation to give it a go. 

And early on Sunday morning I got out my KitchenAid (which I still absolutely love!) and got cooking. I have to admit that it felt absolutely incredible to pop open a bottle of Moët at 8.30 in the morning! But back to the cupcakes now. They were really easy to make and the result was absolutely delicious. Everyone had one and the consensus was that they tasted as good as they looked. All it took was half an hour in the kitchen (plus the cooling time before piping on the buttercream) and voila! They make a perfect addition to any celebration and are a definite must for a champagne brunch! 

Recipe
(Makes 12 normal sized cupcakes)

For the cupcakes
- 170g plain flour
- 2 tsp baking powder
- 160g butter, room temperature
- 160g caster sugar
- 3 eggs
- 3 tbsp Champagne (or other sparking wine)

For the buttercream
- 150g butter, room temperature
- 350g icing sugar
- 3-4 tbsp Champagne (or other sparking wine; PS! Let's admit we all want to add 4!)

To decorate
- Edible sugar pearls

Directions
Firstly preheat the oven to 180C. To make the batter, sift the flower and baking powder in a small mixing bowl and set it aside. Place the butter and sugar into the bowl of a stand mixer fitted with a paddle attachment (or use a whisk - either electric or a normal one) and beat the mixture for 1-2 minutes until light and fluffy. Then in a separate bowl combine the eggs and Champagne and with the mixer at a slow speed add it to the butter and sugar mixture bit by bit until fully combined. Then add the sifted dry ingredients at a slow speed until fully combined. To finish the batter off, beat it briefly at high speed until the mixture is silky smooth. Then line a 12-hole muffin tin with muffin cases and divide the mixture evenly between the muffin cases (filling to almost two-thirds full) and bake in the preheated oven for 20-25 minutes. When the cakes are ready transfer the cupcakes to a wire rack and allow them to cool completely. 

To prepare the buttercream, place the butter, Champagne and icing sugar into the bowl of a stand mixer and beat until soft and fluffy. Spoon the buttercream into the piping bag and pipe buttercream onto the top of each cupcake in a swirl or flower design. Decorate the cupcakes with edible sugar pearls and enjoy! 

Recipe from "Lola's Forever"


27 September 2015

Banana & walnut loaf

Most of the time this is how cooking works for me - firstly I decide on what to make and then I go an buy the ingredients. However, for the past couple of days I had been eyeing the last three bananas that had been in the fruit bowl for a quite some time. And after having one banana with nearly every lunch this week I just could not bring myself to eating those. And there I was - with three bananas that I did not want to eat. Whenever possible I try to make sure that I waste as little (or if possible none) food as I can. So I headed to my cookbook shelf and saw Mary Berry's Baking Bible. As I was in a bit of a bake off mood I decided to flick through it - and there were two amazing banana loaf recipes. Exactly what I wanted! And when I read that one of them is very freezer friendly I was sold.

Most people probably think I'm slightly insane after what I'm going to tell you next. I'm not a massive fan of the way bananas taste like. I find the taste too dominating - whenever you make a smoothie or any other dish and add some banana, that is the only thing you can actually taste! So instead of sticking to the exact recipe I tweaked it a bit by changing some quantities and adding walnuts. 

I was really surprised at how quick and easy this cake was to make. I probably spent 10 minutes preparing it and waiting for the oven to heat up and that was about it. Very fuss free and only used one bowl, so for the people who are not very keen on having to do lots of washing up this recipe is absolutely perfect. And the result - oh my! The cake came out incredibly moist and I found the banana taste was actually quite subtle and the walnuts really added another dimension of flavours and that extra bit of crunchy texture. So after having already eaten my way through one third of the cake I found that it was perfect time to slice it all up, place in a freezer bag with a baking parchment between two slices and store it away for when I need a quick pick-me-up. This definitely makes for a perfect cure for the afternoon energy slump, speedy breakfast on the go or just something one would enjoy with a nice cup of tea. So, if you're like me and have a couple of bananas that you don't know what to do with, this recipe is definitely one to try out. 

Ingredients
- 100g softened butter
- 175g caster sugar
- 2 medium eggs
- 3 ripe bananas, mashed
- 225g self-raising flour
- 1 level tsp baking powder 
- 3 tbsp milk
- 100g walnut pieces

Directions
Firstly preheat the oven to 180C/160C fan. Grease a loaf tin and then line it with baking parchment to prevent the loaf from sticking to it. Then place all the ingredients in a bowl and mix until everything is well blended. If using an electric mixer add the walnuts after mixing everything else together and mix the nuts in afterwards using a wooden spoon or spatula. Then pour the mixture into the loaf tin and level the surface.

Bake for around 1 hour until well risen and golden brown. Leave it to cool in the tin for the first couple of minutes and then place on a wire rack to allow it to completely cool off. Cut into nice thick slices and enjoy! 

Recipe adapted from Mary Berry's Baking Bible.


26 September 2015

Blackberry jam

And so my jam making adventure continues. For the first time in my life I made blackberry jam and I have to say it came out absolutely divine. If I'd have to pick my absolute favourite jam it would be raspberry jam made by my great aunt. Sweet, quite runny and oh so good with absolutely everything - from porridge to pancakes. And as I could not get my hands on any raspberries over here I went for the next best alternative - blackberries. I don't think I'd ever seen a blackberry until I move to the UK. And until a couple of weekends ago I had never picked a single one! After spending a couple of hours on a common I was equipped with a good few kilos of blackberries. And when I got home I set out on a mission to turn my blackberries into all things sweet. I set few aside in a freezer bag, waiting to be made into a delicious crumble once the weather gets really cold and nights get really dark and I'm in desperate need of something comforting. And as for the rest it, I made it into a jam.

One big difference between jams over here and back in Estonia is that Estonian jams are runny, whereas the ones over here are thick enough for spreading on toast without having to worry about it dripping. A couple of phone calls later (as usual, when you need to ask something no-one really picks up their phone!) I had the recipe. Or I should say general directions. Because everyone does their jams a bit differently - and I guess that's one of the beauties of making your own jam. You can play around with the sugar and water to make it as sweet and runny as you want. There are no hard rules and limits - whatever you yourself fancy! And after an hour or so later I had a lovely collection of jars to add to my already quite varied jam collection. If I carry on this way I  will be stocked not for just one winter, but many winters to come! I've already polished off a jar by adding a generous spoonful or two to my morning porridge...


Ingredients:
- 2.2kg blackberries, rinsed
- 1.5kg sugar
- 225ml water


Directions:
Place the blackberries, sugar and water into a large saucepan and mix. Bring to boil and skim off the foam. When the berries have broken down and there is no more foam divide up between sterilised jars.

I have to say that this jam is quite on the sweet side so if you prefers yours slightly less sweet reduce the amount of sugar a bit.


11 September 2015

Chilli apple jelly

I know it's been literally forever since I last posted anything here, but I've been so incredibly busy over the last months. For those of who don't know yet, I'm now officially a Mrs and anyone who has had any involvement with planning a wedding knows how much time and effort it all takes. And apart from being buys, cooking for one is not that much fun and I've kind of just resorted to making big batches of soup and having that over the week. Which, to be honest, isn't no were near to being a good blogging material.

But now the autumn is slowly creeping in and you can really feel the change in weather. And around this time I go into full blown preserve making mode - as long as I can get my hands on some berries or fruit all I want to do is stock up for the winter. Nevermind the fact that I still have some jams that I made back in 2011. But this year I've decided to try a couple of new things, especially as I still have plenty of the stuff that I've made in the previous years. So, my first project so to speak was chilli apple jelly. After spending a lovely afternoon with my mother in law she told me all about the gorgeous things she had made (and already eaten), and being a massive fan of cheese this jelly recipe really stood out. So equipped with my apples and chillies (which unfortunately I had to buy) I arrived home with a clear mission - I am going to make that jelly. I have to admit when I read the recipe it seemed like a quite long winded process, but as I made the first steps in the morning and let it drip whilst I was out and about and then finished it off in the evening it didn't feel bad at all.

Whenever I make any preserves I never manage to either fill all the jars or there's a tiny bit left over. And what I usually do in these circumstances is I put the leftovers in a glass ramekin or two and enjoy them over a couple of days. This is actually pretty great as I get to taste the real product without having to open up a massive jar and then having to polish that off. And let's face it, if I'm all by myself and want to maintain a relatively healthy diet, eating a lot of cheese with some crackers smothered in apple jelly is probably not the best way to do it. But it definitely would be a very delicious way of doing it!

So, a little bit about the jelly itself. The first thing that I absolutely love is the way it looks - transparent golden jelly with red chilli specks inside. It's quite magnificent. And the taste is just incredible - sweet with a nice kick to it. And to have it with some cheese, I had it with mature cheddar, is just divine - it really adds the final touch to the whole combination. So having finished off my tiny ramekin I can't wait to have an excuse to pop open a jar and have some more of this golden deliciousness.

Ingredients
(Makes about 1.5l of jelly)
- 2kg cooking apples
- cold water
- 1.5kg sugar
- 3 birds eye chillies, chopped

Directions
Roughly chop the apples and place into a large saucepan. There's no need to peel or core the apples, so it makes the whole preparation process a lot easier and faster. Then cover with cold water and bring to boil. Reduce the heat and simmer for 30-40 minutes or until the fruit is all soft and squishy.

Then drain the fruit and liquid through a sterilised muslin - leave it for a good 3-4 hours at least.

Measure the clear juice and allow 450g sugar and 1 chopped chilli for every 500ml of juice. Pour the juice, sugar and chilli into a clean saucepan and bring to boil, stirring until the sugar has dissolved. Reduce the heat and skim off the foam from the surface. Bring back to boil and boil vigorously for 15-20 minutes until the setting point is reached (105C on the sugar thermometer).

Remove the pan from heat and pour the jelly into sterilised jars. Let them cool down and store them away. These will keep for 2 years, unopened.

Recipe adapted from BBC Food recipe "Chilli apple jelly"


20 January 2015

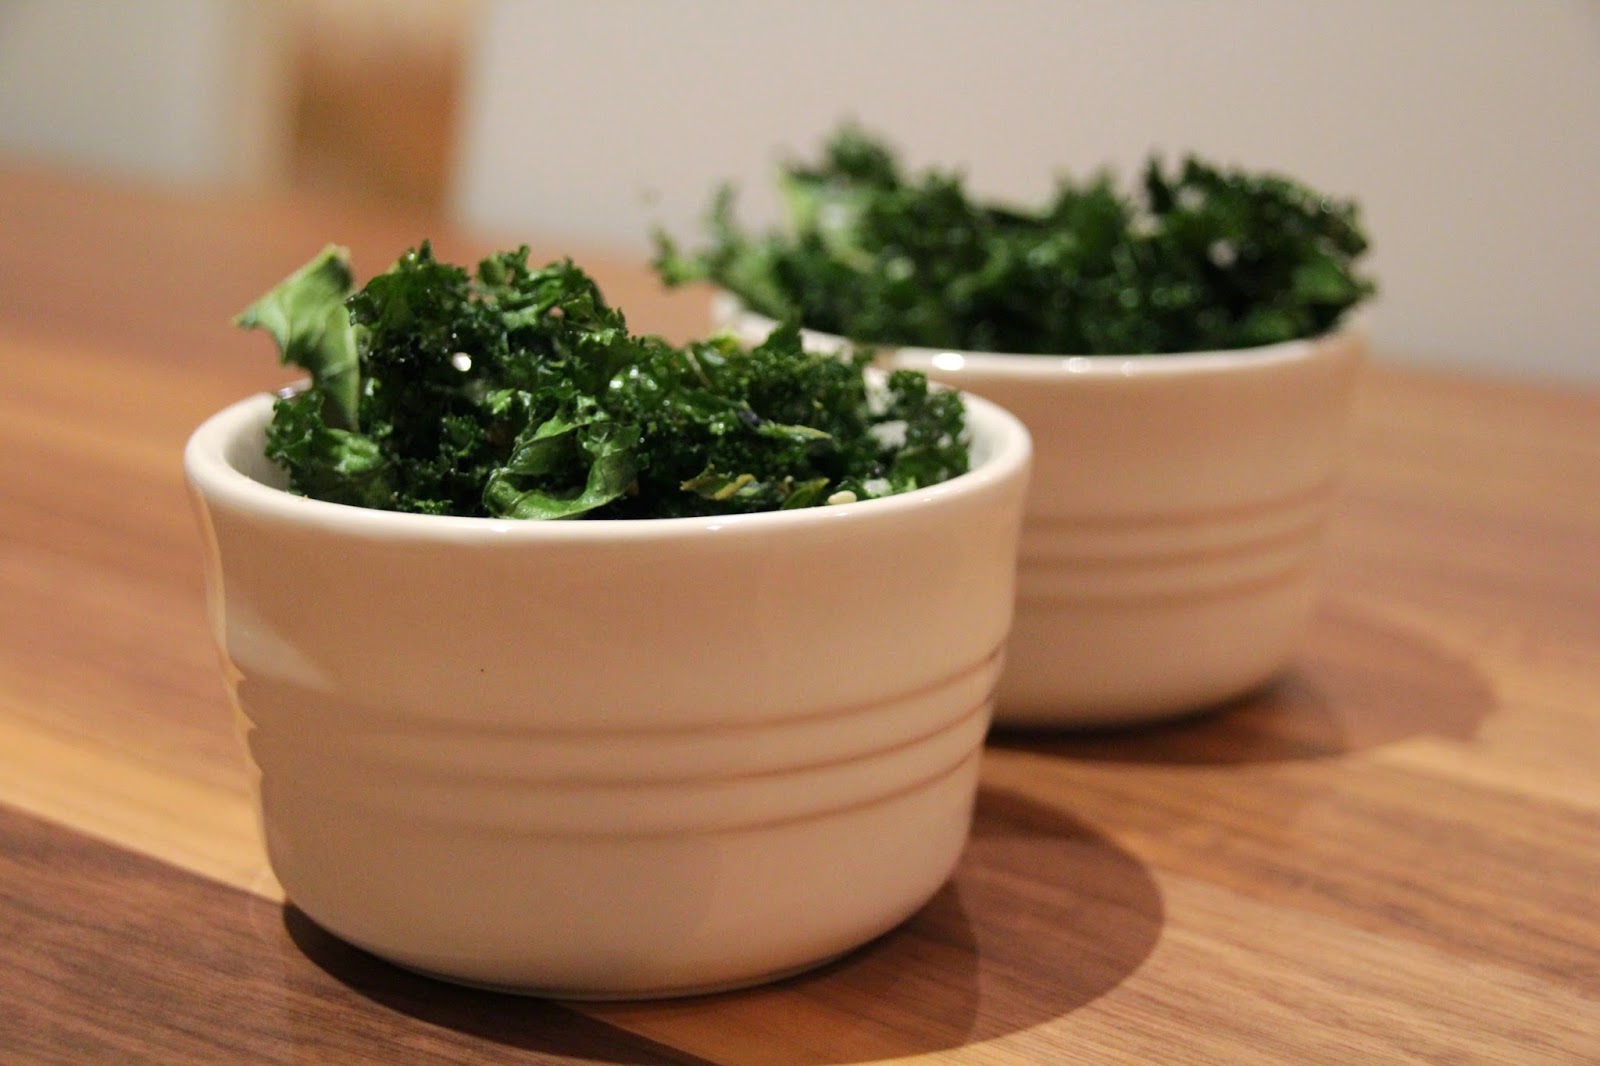
Kale crisps

I know I'm a bit late with my kale chips - they have been around for quite some time. But they do say, better late than never! To be totally honest with you I'm not a huge fan of kale. So far I've tried to include it in juices and have tried to steam it a couple of times, but so far no luck - I'm still not convinced that I actually like it. I have never had kale crisps before so I had no idea what to expect and, frankly, I was half expecting that they would turn out not so good. But oh boy was I proven wrong - they came out absolutely divine!

I decided to try out two different flavours. I made one batch with sea salt and the other one with a wasabi sesame spice mix I have and they both came out really nice. I love the spicy kick the wasabi ones have, but out of those two I prefer the classic sea salted one. I really don't know whether that's because the crisps are bigger (I made that batch first) or is it really just because I love the taste. But either way both are really-really nice. It's lovely to have something to nibble on that is not too high in calories and too unhealthy. Only word of advice though - as they have quite a bit of salt don't overindulge.

The only downside I can think of is that as they're so thin and crispy you end up with kale crumbs everywhere. But then again, the same happens when you eat normal crisps so I really should't be complaining.

I will definitely make them again - I have already decided to try one out with chilli flakes, then one batch with Ras el-Hanout, cajun ones could be quite nice and I would love to know how they would taste plain, no salt or anything ... So by the looks of it, I'll be making kale crisps in every couple of days as I really want to try them all!

Ingredients
- 90 kale (after the stalks have been removed
- 1 tbsp olive oil
- Sea salt
- other spices/herbs/seasoning

Directions
Wash and dry the kale completely (I left it out for half a day to dry out properly). Preheat the oven to 130C fan. Place it in a big bowl and add the olive oil. Mix the olive oil in (I used my hands) to make sure that the kale is evenly coated. Cover the baking tray with baking paper and place half the kale on it, spreading it out and making sure that it is not piled up. Then season it with either salt or other spices and place it in the oven and cook for 20-23 minutes until nice and crispy. After it's cooked, take it out and leave to rest for 5 minutes, this ensures that they really crisp up. Place in a bowl and enjoy!


23 November 2014

Red lentil puree soup

I have been so incredibly busy over the past couple of months that I haven't really had any time to post anything. Due to lack of time I've really resorted to batch-cooking - anything that I can make in large quantities and freeze goes. I received a cookbook for Christmas two years ago and when I got it I marked a recipe I wanted to try the very same day. Fast forward nearly two years and I've finally gotten around to making it. I'm a big fan of Arabic food in general and when a dear friend of mine got me this book called "Araabia Köögi Radadel" (basically "On the tracks of Arabic Cuisine" or something along those lines) I was absolutely thrilled.

So after eating my usual puree soups (you can find all of them on this blog) I really felt the need for a change - it was about time I switched one of them for something new. As I was flicking through my recipe collection on my computer and failed to find something that really appealed to me that day I had a quick glance at the cookbooks I have. And then it hit me that I had bookmarked this and it was just waiting for its turn! Also, I happened to have all the ingredients at home so I took the book with me and headed straight into the kitchen.

This is incredibly easy to make (to be fair, most soups are) and tastes divine. And a huge perk is that it is so warming and filling - exactly what one needs on a cold autumn / winter evening. Also, I love the vibrant yellow colour, kind of feels like eating a bit of sunshine. Definitely one of my new favourites and I've already bought all the ingredients for a next batch. I think it is also worth noting that this soup freezes well. All you need to do is take it out the night before and let it defrost in the fridge. For a really indulgent dinner, enjoy with a dollop of creme fraiche and a warm pita bread.

Ingredients
(Serves 4)
- 1 mug red lentils (approx 250ml)
- 1 small potato, peeled and cubed
- 1/2 small tomato
- 1 small carrot, cubed
- 1 onion, cubed
- 1 glove of garlic
- 5 mugs of chicken stock (approx 1,25l)
- Pita bread, to serve

Directions
Put the lentils into the pot. Add potato, tomato, carrot, onion and garlic and cover with chicken stock. Bring to boil and simmer on low heat for 30 minutes or until the lentils have softened and turned yellow. Then either puree the soup in the food processor or use handheld mixer for that. If necessary add a bit more water. When serving pour the soup through a sieve to achieve a silky smooth consistency. Serve immediately with some warm pita bread. Enjoy!

Recipe from the book "Araabia Köögi Radadel"


28 September 2014

Apple juice

For as long as I can remember autumn has pretty much been synonymous with apples. Every year we went down to the countryside to pick the apples and then spend a good evening or two making apple juice. And I'm not talking about a couple of kilos of apples and a couple of bottles of juice. I'm talking about a massive cartload of apples and litres and litres of juice - it was enough to last us the whole year. And bearing in mind that we drank apple juice all the time and it was 5 of us, we made a lot of juice. I went to the countryside yesterday and had the chance to pick some apples, nothing compared to the amounts we do back in Estonia, but still a decent quantity to help to fill out the pantry.

Making juice today at home was miles apart from doing that in Estonia - instead of the crushing machine and the juice press I used my small juicer. And I have to admit that when I was finally done with the juice my kitchen looked like a battlefield - splashes of apple juice on the counter and cupboards and incredibly sticky everywhere else. But the smell of fresh apple juice made it so worth the mess. 

I can honestly say that making apple juice is a bit of a hassle, but it is so worth it. Store bought juices have never even come close to the real home made ones and I am so glad that I got myself together and made some. In all honesty, in a couple of days time I might go through the hassle once more, so I'd have a nice supply for when my friends and family come to visit or when I just feel like treating myself to something that reminds me of Estonia. 

Ingredients
- 4.5 l freshly pressed apple juice
- 100 g sugar
- Sterilised glass bottles / jars

Directions
First put the apples through the juicer until you have a good 4.5 litres of apple juice. Then strain the juice through a muslin cloth to remove all the tiny bits. 

Place everything into a large pot and bring up to 85C. Skim the foam and let it simmer for 15 minutes or so. Then add the sugar. If you want yours sweeter add more than that, but I prefer mine quite sour (and to quote my mum - you can always buy the sugary syrup "apple juice" from the shops). Stir until the sugar has dissolved completely. 

Then pour the juice into the bottles / jars and close the caps whilst the juice is still hot. Let it cool down and label it. Enjoy immediately or put away for the cold winter months to come. To serve, dilute it with water and for added twist serve with lemon and orange slices. 


20 September 2014

Gnocchi with chicken & courgette sauce

When I made this beauty for dinner last night it didn't cross my mind that I might jinx the beautiful weather we've been having over the past couple of days - it still felt like summer. But this morning when I woke up the autumn has finally arrived with it's grey sky and rain. So in hindsight I'm actually quite happy that I've got three more portions of this lovely and filling pasta left to eat over the next couple of days. I've put two portions of it in the freezer and will let you know whether it turns out alright or not.

I decided to make this because for the couple of days before, all I could think about was that I really-really want something with courgette in it. I probably spent a good couple of hours trying to find that something that just popped out and made me rush to the store. However as I did not manage to find that something special I decided to experiment and I had no idea how it would turn out. And oh my did it turn out well, even if I do say so myself.

It's easy and quite quick to make and I love that the portion sizes are really generous. It's really filling and warming, but at the same time no too heavy. I was really surprised that I did not have to add any water or chicken stock as the courgettes helped to keep it liquid enough throughout the whole process. This is definitely something that I'll make again over the coming months to keep the grey and cold from getting to me.

Ingredients
(Serves 4)
- 1 tbsp olive oil
- 1 red onion, chopped
- 2 cloves of garlic, crushed
- 500g courgette, cubed
- 380g chicken breast, cubed
- 1 can chopped tomatoes
- Parmesan cheese
- 500g gnocchi
- Fresh basil
- Salt
- Pepper
- Mixed italian herbs

Directions
Heat the oil in a thick bottomed pot and fry the onion and garlic for around 10 minutes until soft and fragrant. Add the chicken and fry until seared on all sides. Then add the courgette and fry for another 5 minutes unit it starts to soften. Then add the chopped tomatoes and season with salt, pepper and mixed herbs. Bring to simmer and place the lid on the pot and simmer for 30 minutes or so.

Then add some torn basil, a bit of parmesan cheese and the gnocchi and simmer for another 5 minutes.

Place on a plate and serve immediately with some basil, fresh pepper and parmesan.

Inspired by the BBC Good Food recipe "Tomato & Courgette stew"

4 July 2014

Prawn & Harissa stew with couscous

One of my go to meals during revision period was this lovely Middle Eastern flavoured stew. It is really filling, incredibly quick to make (it literally takes 10 minutes) and so flavourful. And as an added bonus it is healthy as well! The only problem with stews of any description is that they are not the most "photogenic" of foods, but I just had to really share this one with you.

Like with so many of my recipes, I had bookmarked it ages ago and when I finally got around to make it I was more than pleasantly surprised. Sometimes the problem with healthier options is that they are not the most flavourful and even worse, still leave you feeling hungry after eating them. Whereas this is exactly the opposite.

This dish also has a very nice mixture of different textures - soft grainy texture, semi-crunchy onions, juicy prawns complimented by a creamy tomato sauce. Top that off with amazing flavours and you've got a real crowd pleaser. It is worth mentioning that if you're not a big fan of spicy food then it might be a good idea to reduce the amount of harissa paste you add into the stew - I like my food quite spicy and found that the 2 tbsp was just enough for my liking. But that's another perk of cooking at home - if you don't like an ingredient, leave it out and the same way if you like less spicy, add less spices.

All in all, this is a lovely and incredibly quick stew that makes a perfect and filling mid-week meal.

Ingredients
(Serves 1)
- 50g couscous
- Olive oil, for frying
- 100ml chicken stock
- 1/2 red onion, sliced
- 1 garlic clove, crushed
- 1/2 tsp ground cumin
- 200g tinned chopped tomatoes
- 1 tsp harissa
- 75g raw peeled prawns
- Coriander leaves, to serve

Directions
Put the couscous in a bowl with a tiny splash of olive oil and cover with boiling chicken stock. Cover and let it swell until you prepare the stew.

To make the stew, heat the oil in a pan, add the onion and garlic and fry until just tender. Add the cumin and fry for another minute. Then add the tomatoes and harissa and bubble everything together until it thickens. Lastly, stir in the prawns and cook for 3 more minutes (or until the prawns have turned pink).

To serve, fluff the couscous with a fork, pour the stew over it and scatter the coriander over. Serve immediately.

Recipe from BBC Good Food 


2 June 2014

Marble cheesecake

So I'm finally done with my LPC exams and it feels so good to know that I'm done with exams for the rest of my life (at least I hope so!). I've spent a couple of days at my parents' place now and to celebrate the end of my school year and I decided to bake a lovely cheesecake. I usually make the classic cheesecake, but I wanted to try something new. Most of my favourite cheesecake recipes come from a book called Juustukoogid by Lia Virkus and Angeelika Kang (sorry my dear non-Estonian reads, but this book is only in Estonian) as they are relatively easy to make, don't require a huge array of different ingredients and so far every last one of them has come out absolutely amazing.

As the weather has been really bad here lately - I honestly can't remember the last time it was only +8C in the beginning of June - I wanted something slightly richer and less fruity that I usually would go for in the summer. So we were flicking through the book and a couple of possibilities caught our eye - carrot cake cheesecake, peanut butter cheesecake and Daim chocolate cheesecake to name a few - but the one that really stood out was this Marble cheesecake.

It takes slightly more time to prepare than the other baked cheesecakes I've made because you need to melt the chocolate, but leaving that aside it is as quick and straightforward to make as all the other ones. I love how you could taste a hint of curd cheese / quark (kohupiim - творог) in the cake itself and how the base reminded me of a chocolate version of a cheesecake I used to eat as a child more than 10 years ago. The cake is perfectly balanced - not too chocolatey and not too sweet and perfectly creamy. It makes a perfect teatime treat, which is guaranteed to please everyone. It tastes delicious either on its own or if you want to make it more summery or just add a twist, serve it with a lovely dollop of homemade jam or with fresh berries. 

Ingredients

(Serves 12)
Base:
- 130g butter, melted
- 75ml sugar
- 1 tsp vanilla sugar
- 1 egg yolk
- 50g dark chocolate, melted
- 250ml flour
- 1/2 tsp salt

Filling:
- 500g curd / quark / kohupiim / or ricotta cheese
- 500g Philadelphia cream cheese
- 250ml sugar
- 1 tsp vanilla sugar
- 2 tbsp flour
- 4 eggs
- 50ml milk
- 250g sour cream
- 100g dark chocolate, melted

Directions
To make the base whip together warm butter, sugar and vanilla sugar. Then add melted dark chocolate and the egg yolk. Finally add flour and salt. Put the base batter in a lined 24-cm springform tin and cook at 180C (fan) for 15 minutes.

For the filling, mix together curd, cream cheese, sugar, vanilla sugar, flour, eggs, milk and sour cream until smooth and creamy. Then divide the mixture into two parts - keep 2/3 in the same bowl and place 1/3 of it in another bowl and mix that smaller batch with the melted chocolate. Pour the light mixture on top of the base and then top it off with the chocolate mixture. To mix the layers a bit draw 8-shaped circles with a sharp knife, but be careful not to overdo it as you don't want the cake to look muddy.

Bake at 175C (fan) for 1 hour. Then let the cake cool down in the oven with the door open for another hour and then chill the cake overnight (or at least for 5 hours) before serving. In order to make it easier to take it out of the tin place the cake in the freezer for 10 minutes and then place on a serving plate, slice, top the individual slices with fruit / name if you wish and enjoy!

Recipe from a book "Juustukoogid"